Old School Training Tips
- by Rich Gaspari
Spider Curls: The Secret Weapon for Bigger, Better Biceps
Meet Your New Biceps Secret Weapon: Spider Curls
If you’ve hit a plateau with your biceps training or your arms aren’t quite popping the way you want them to, it might be time to bring in a secret weapon—Spider Curls.
No, they’re not named after Spider-Man, but they do have superpower potential when it comes to biceps growth.
In this blog, we’ll break down everything you need to know about Spider Curls: what they are, how to do them properly, the benefits, variations, common mistakes, and advanced tips to make the most out of this killer isolation exercise.
What Are Spider Curls?
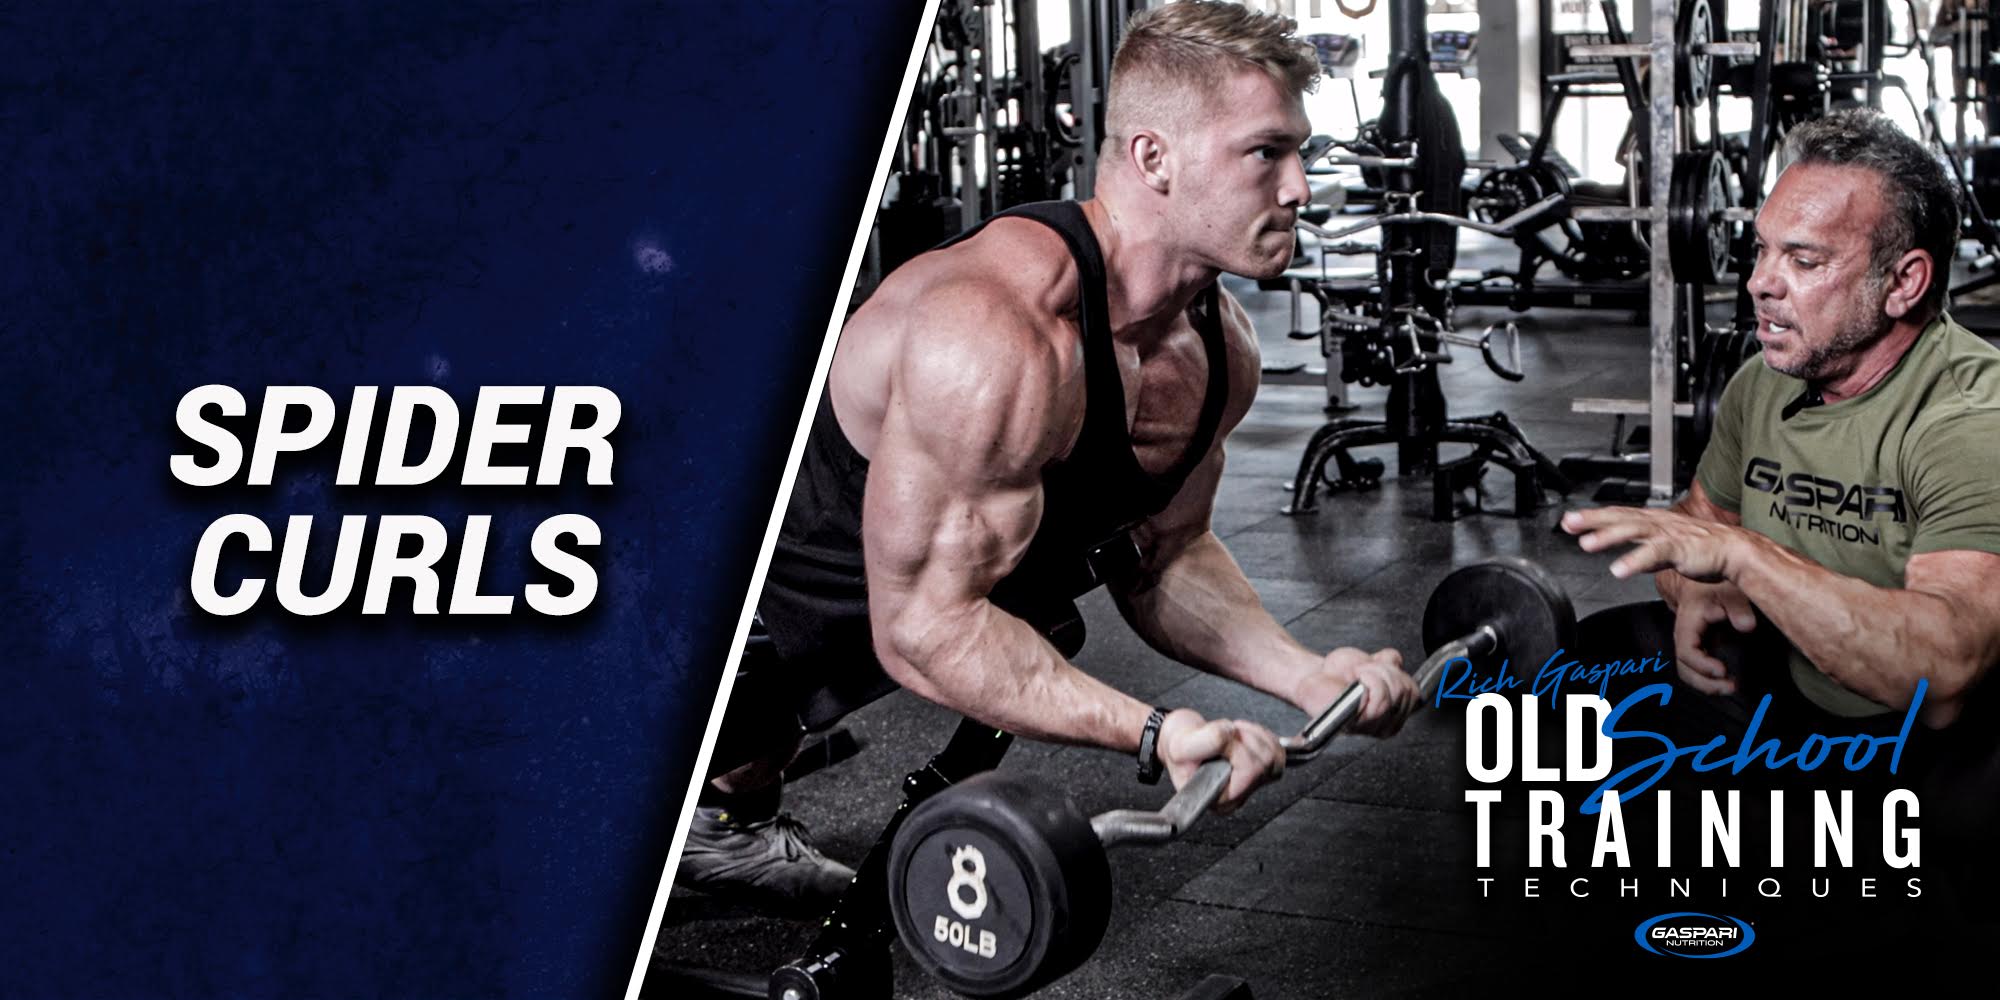
Spider curls are a bicep isolation exercise that targets the short head of the biceps. Performed while lying chest-down on an incline bench, the arms hang freely in front of the body—forcing your biceps to do all the work without help from your shoulders or momentum.
They’re called “Spider” curls because your body positioning resembles a spider clinging to a wall. Creepy name. Incredible results.
Muscles Worked in Spider Curls
While the focus is on the biceps brachii, particularly the short head, spider curls also work:
Brachialis – Adds width to the upper arms.
Forearms (brachioradialis) – Helps with grip and control.
Stabilizers in the shoulder – Keeps posture strict and tight.
Because the arms hang perpendicular to the floor, spider curls maintain constant tension on the biceps—something traditional curls often fail to do.
Why Spider Curls Are So Effective
Here’s why Spider Curls are loved by bodybuilders and gym rats alike:
1. Strict Isolation
Your back is supported by the bench, and your elbows are forward, eliminating momentum. This forces your biceps to contract harder and longer.
2. Peak Contraction
The setup allows for full range of motion and a strong squeeze at the top of the movement, crucial for building the biceps peak.
3. Constant Tension
Unlike standing curls, there’s no “rest spot” during a spider curl. This burns the muscle more and triggers hypertrophy.
4. Minimal Cheating
It’s very hard to swing or recruit other muscles. If you’re someone who tends to use your shoulders during curls, this fixes that.
How to Do Spider Curls (Step-by-Step)
Equipment Needed:
Incline bench (set to 45-60 degrees)
EZ-bar, straight barbell, or dumbbells
Setup:
Set the incline bench to about 45 degrees.
Lie face down with your chest supported and arms hanging over the front.
Grab your weights with an underhand grip (supinated).
Execution:
Start with arms fully extended and biceps stretched.
Curl the weight slowly toward your shoulders, keeping elbows pointed down.
Pause and squeeze the biceps at the top for 1–2 seconds.
Lower the weight in a controlled motion.
Repeat for 8–12 reps.
Spider Curls vs Preacher Curls
Feature
Spider Curls
Preacher Curls
Arm Position
Hanging vertically
Rested on a slanted pad
Tension
Constant throughout the movement
Reduced tension at bottom
Muscle Focus
More on short head of biceps
Balanced bicep activation
Equipment Needed
Incline bench + weights
Preacher curl bench + weights
Momentum Involvement
Almost zero
Slight possibility at start
Both are amazing, but Spider Curls give a more intense stretch and contraction. Add both to your routine for complete development.
Variations to Try
Spider curls aren’t one-size-fits-all. Here are some killer variations:
Dumbbell Spider Curls
Allows each arm to work independently, correcting muscle imbalances and enhancing range of motion.
EZ-Bar Spider Curls
Easier on the wrists and better grip for most people. Ideal for those with wrist pain.
Reverse Spider Curls
Use an overhand grip to target your brachialis and forearms. Great for full-arm development.
Cable Spider Curls
Attach a low pulley cable behind the bench for constant resistance. Burns like fire—in a good way.
Common Mistakes to Avoid
Even though Spider Curls are a strict movement, some people still manage to do them wrong. Watch out for these mistakes:
Using Momentum
If you're swinging or jerking the weight, you’re missing the point of Spider Curls. Drop the weight and slow down.
Elbows Flaring Out
Keep them tight and pointed toward the floor throughout the rep. This ensures max bicep engagement.
Not Fully Extending
Partial reps cheat your gains. Let your arms fully extend at the bottom for a good stretch.
Rushing the Reps
Spider Curls are about time under tension. Control each movement—especially the eccentric (lowering) phase.
Pro Tips to Maximize Your Gains
Use a tempo – Try 2 seconds up, 1 second squeeze, and 3 seconds down. You’ll feel every fiber firing.
Add intensity techniques – Try drop sets or rest-pause sets once you’re comfortable with the movement.
Train them at the start or end – Some people use Spider Curls to pre-exhaust the biceps before heavy lifts; others finish their workout with them for a final pump. Experiment and see what works best for you.
Stretch after – Spider Curls shorten the muscle a lot. Give your biceps a solid stretch after your session to aid recovery and growth.
When Should You Do Spider Curls?
Spider Curls are perfect for:
Arm Days – Add them to target biceps specifically.
Push/Pull Splits – Use on pull days for biceps burnout.
Hypertrophy Programs – Great when volume and time-under-tension matter.
Train them 1–2x per week for best results, ideally after your compound pulling exercises like pull-ups or rows.
The Bottom Line: Spider Curls for Serious Arm Growth
Spider Curls may look simple, but they deliver serious results. If you want peakier, stronger, more defined biceps, they deserve a permanent spot in your training plan.
They isolate the muscle, minimize cheating, and maximize contraction—all of which are essential for sculpting arms that actually turn heads.
So next time you’re hitting biceps, skip the ego curls and go full spider mode. Your sleeves might not thank you, but your biceps definitely will.
Best Of Gaspari Nutrition
$57.99
Out of Stock
$24.99
Out of Stock
